Ender3 Upgrade Pt.3 (Electronics, Firmware, and Tuning)
Having completed the mechanical assembly on my Ender 3, it was time to move on to getting all of the electronics dialed in, and tuned.
Marlin Firmware
The first step was to get the latest-and-greatest version of Marlin 2.0 and add my configuration. Since I intended to run the inductive/PINDA type bed leveling probe, that meant some changes to my configuration. As fate would have it, I’d go back to my BLTouch (more on that later).
I maintain my own branch of Marlin for this printer, to keep track of my changes, which you can find on github.
I won’t bore you with the details of getting PlatformIO setup since there are very thorough directions available directly from them. Suffice to say, you’ll need it installed in order to compile a custom firmware.
I have been using the CLI of PlatformIO for some time for various Arduino projects, and I have it installed in a non-standard location. So for me, it’s as simple as running ~/.platformio/penv/bin/pio run.
That will build my firmware bin file. Now, how to upload it to the printer? It had been so long since I’d worked on this machine that I’d completely forgotten how it works. I tried connecting over USB, and using OctoPrint firmware updating plugins, all without success.
Before too long, I realized that all I had to do was drop my firmware binary onto an SD card, and make sure that SD card was inserted into my SKR 1.3 when it booted up.
That meant cp.pio/build/LPC1768/firmware.bin at /path/to/sdcard/, then unmounting the SD card, and putting it in the control board.
Auto Bed Leveling
Ultimately, the step took A LOT of time, and I ended up reverting to my previous BLTouch configuration. I’ll elaborate on this, but first, let’s talk about my attempts to get the inductive sensor to work.
What didn’t work
I had bought a generic inductive proximity sensor. This LJ18A3-8-Z/BX to be precise. It’s a NPN NO sensor, which is meant to operate at between 6 and 36V, with an approximate sensing distance of 8mm.
Given that the Ender 3 runs a 24v power supply, and my SKR 1.3 controller board is only able to tolerate 5v on it’s z-min GPIO pin, some wiring needed to be done in order to make everything operate at it’s appropriate voltages.
I’ll spare you all the technical details, but basically what I needed was to power the sensor directly off of the 24v power supply, and use a voltage divider on the sensor pin to drop it down to a safe voltage for the controller board. I more-or-less followed the excellent guidance found in this blog post.
The result was this simple circuit, which I threw together onto a piece of perfboard.
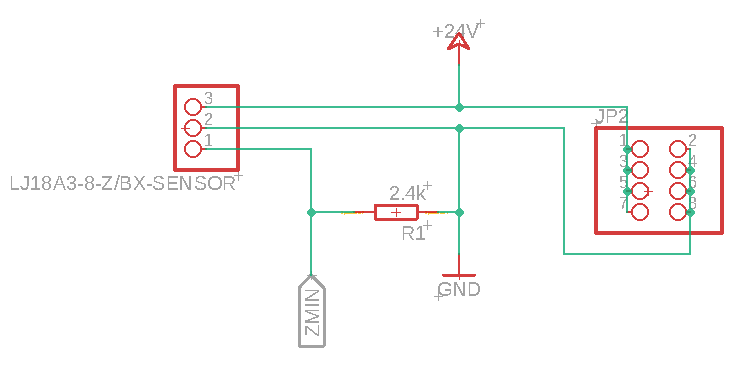
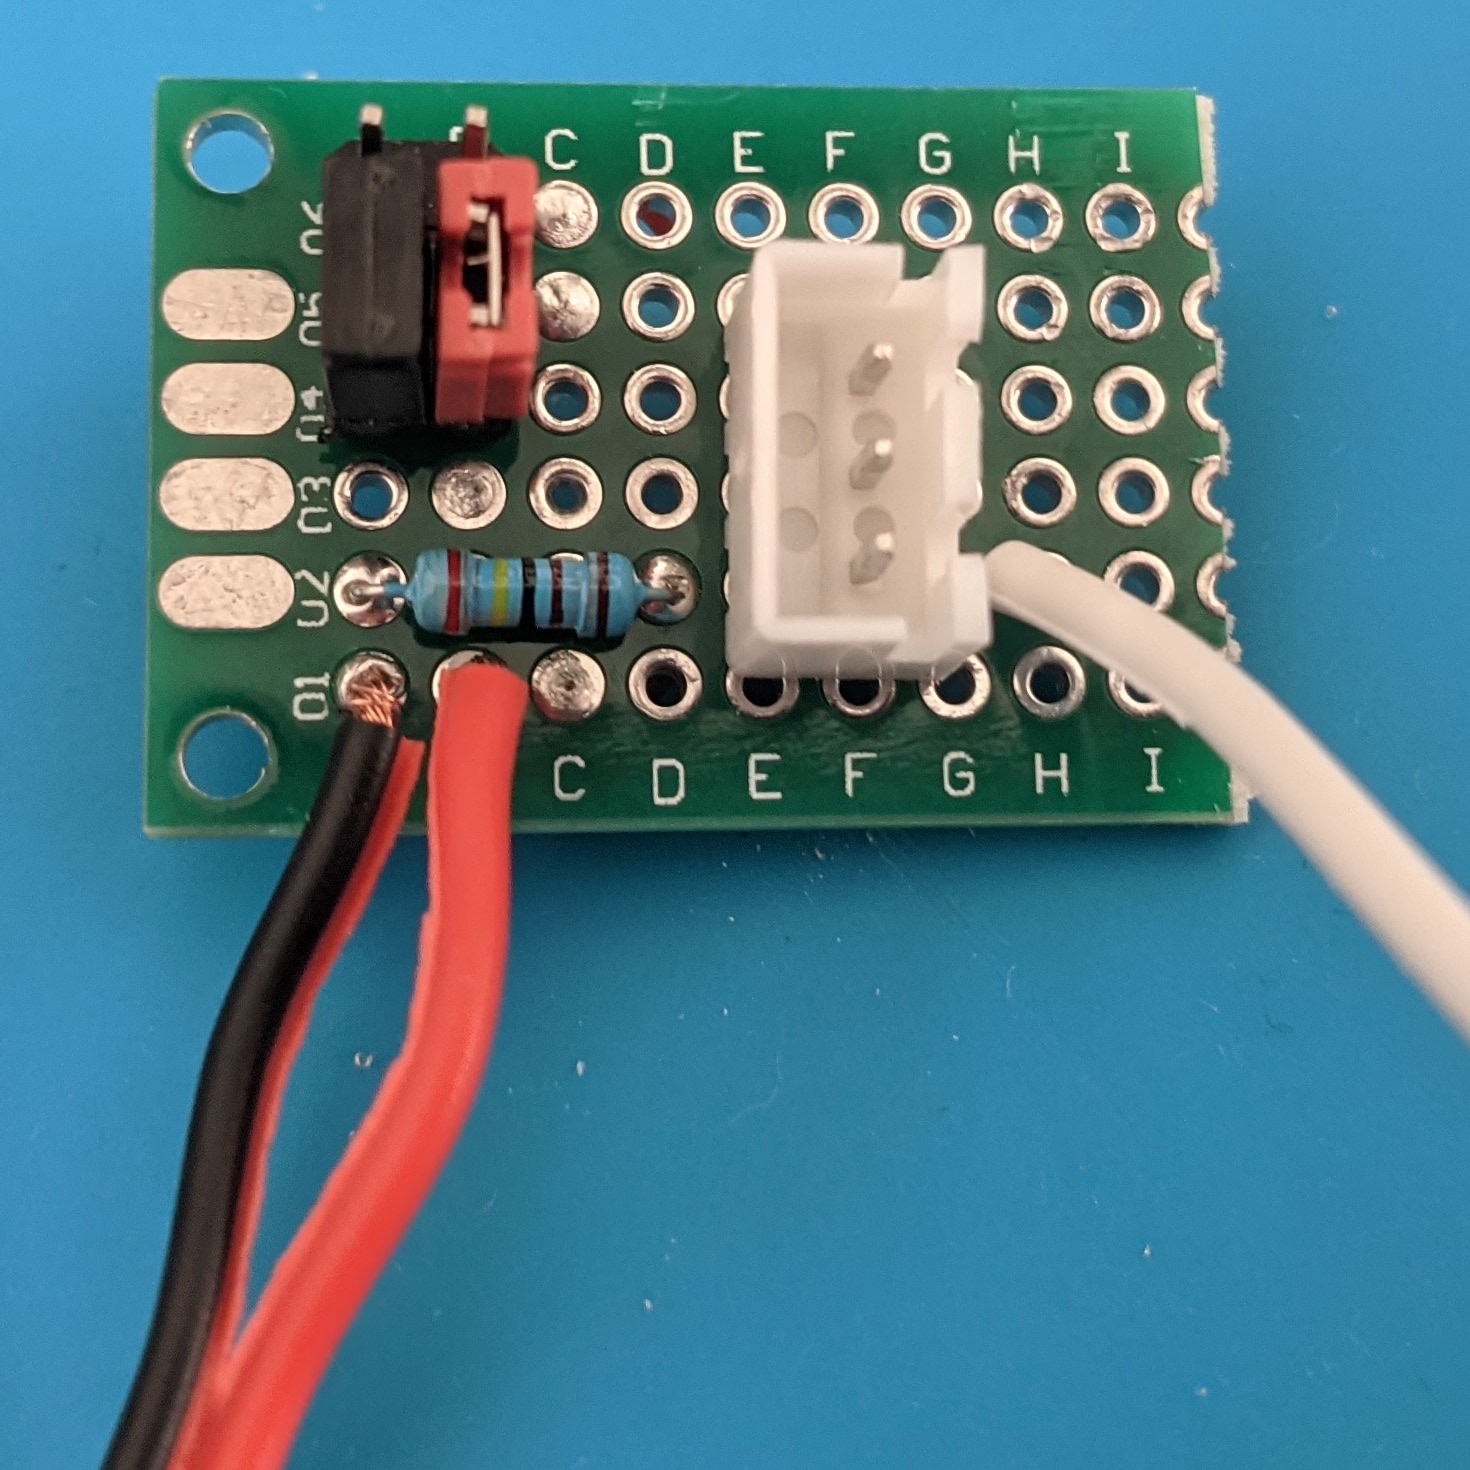
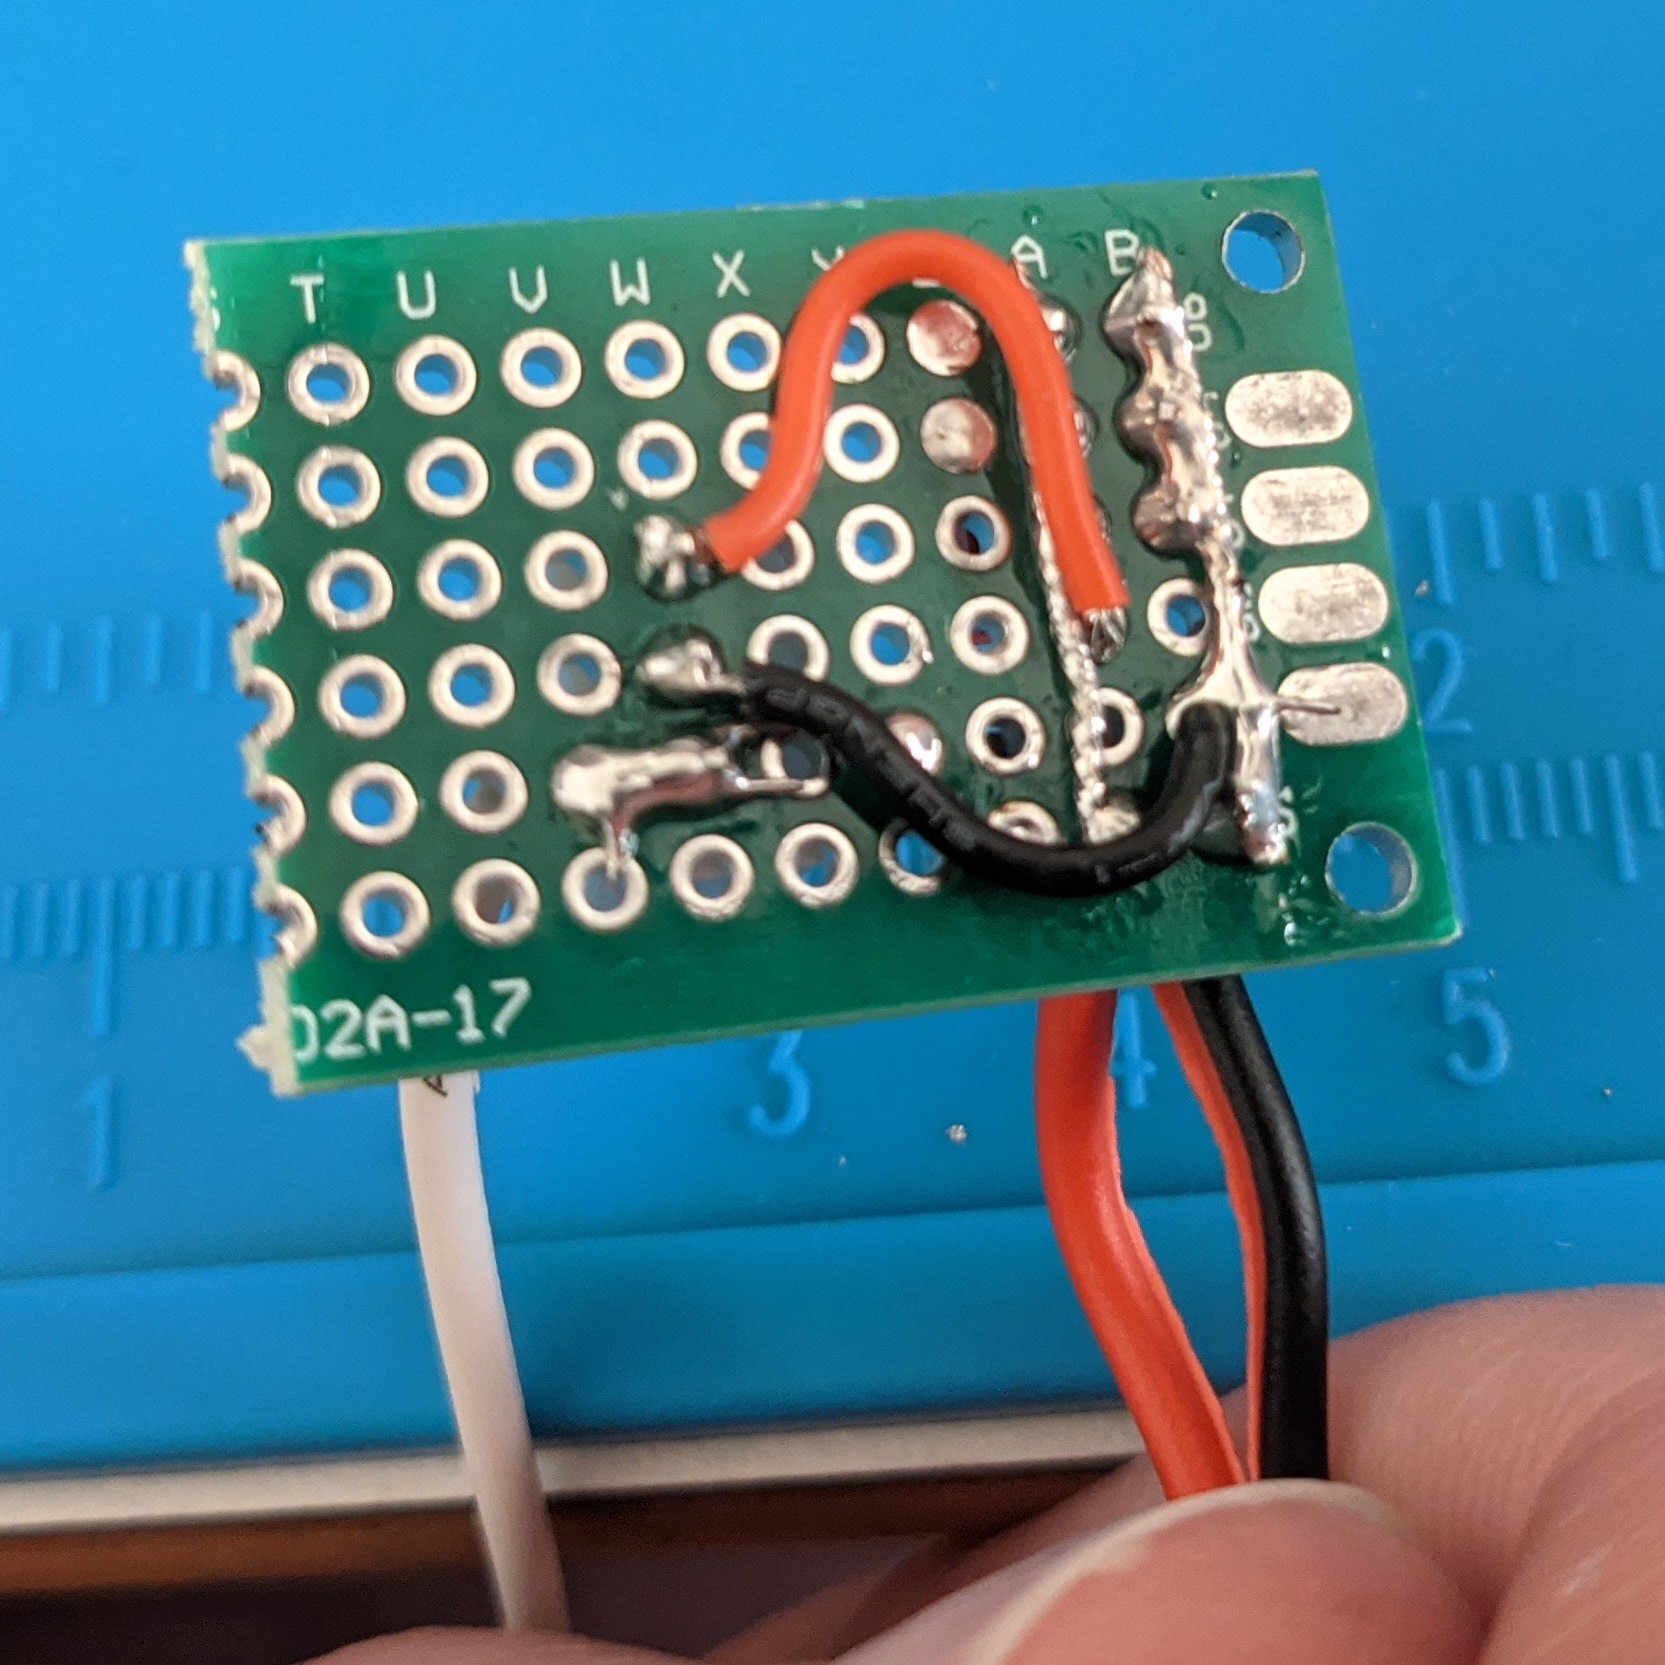
Proud of myself for wiring this up, and quickly bench-testing to see that it did properly trigger the sensor when it came into proximity with metal, I buttoned up the whole machine, ready to move on to tuning.
Unfortunately, when I finally dialed in my z offset, and tried my first test print, I found that the bed leveling seemed WAY off. It was digging into the build plate on the left and right sides, and was not anywhere NEAR the bed in the center.
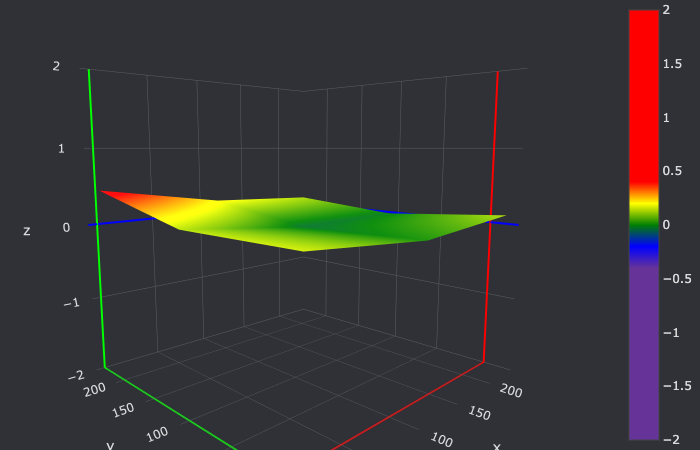
I’d be lying if I told you I didn’t spend several hours trying to troubleshoot this, but ultimately, I simply installed Bed Visualizer on my OctoPrint server, and pretty quickly saw the issue.
With the inductive sensor, the firmware thought my bed looked like this.
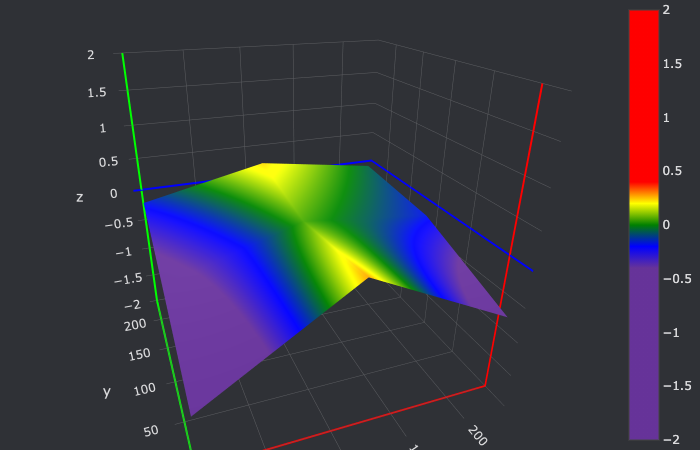
When in reality, it looked like this.
Something was clearly wrong. Rather than spend another eternity trying to figure out why it’s mis-reading the shape of the bed, I made the decision to go back to my BLTouch. I had opted-out of using it because the pin had gotten bent and a little mangled in the past, and I thought this meant I had to replace the whole sensor. Imagine my surprise when I discovered that I could just order a new pin!
Once I printed a new part, tweaked the firmware, and got the BLTouch mounted, this was the resulting mesh.
Okay! That’s out of the way, tuning time!
Tuning
There’s not a TON of interesting stuff here, but it is necessary after all of these changes, to make sure things are dialed in and working.
PID
I enabled PID autotuning via the LCD in my Marlin firmware, so I could very easily do this right away using these instructions.
That said, there are a couple factors which were important.
- I cranked the cooling fan(s) up to 100%
- I tuned for 225C since I do lots of PETG, so this is roughly between my PLA and PETG printing temps.
Slicer
The HMG5 has DRAMATICALLY increased cooling capabilities, so I needed to adjust my slicer to allow lower fan speeds. It was set at min and max of 100% fan speed due to my old cooling setup. I set the minimum to 20%.
Also of note, is that I PID tuned with the cooling fans fully on. Even though the fan ducts aren’t directed to the heater block, when the fans are at full speed, it impacts the ability for the heater block to warm up. When I did my first test prints, I kept getting thermal runaway errors!
E-Steps
I followed these steps to dial in my e-steps.
That said, I had the right value set in my firmware config from the last time I had tuned, and the value remained the same. Namely 99.00.
Z-Offset
I also enabled the z-offset wizard in my firmware. This is a great feature, and I followed the excellent video instructions from TeachingTech to use it (tho the steps are super easy).
After using the wizard, with the BLTouch, I found that no baby z stepping was required to further tune my z-offset, a huge bonus!
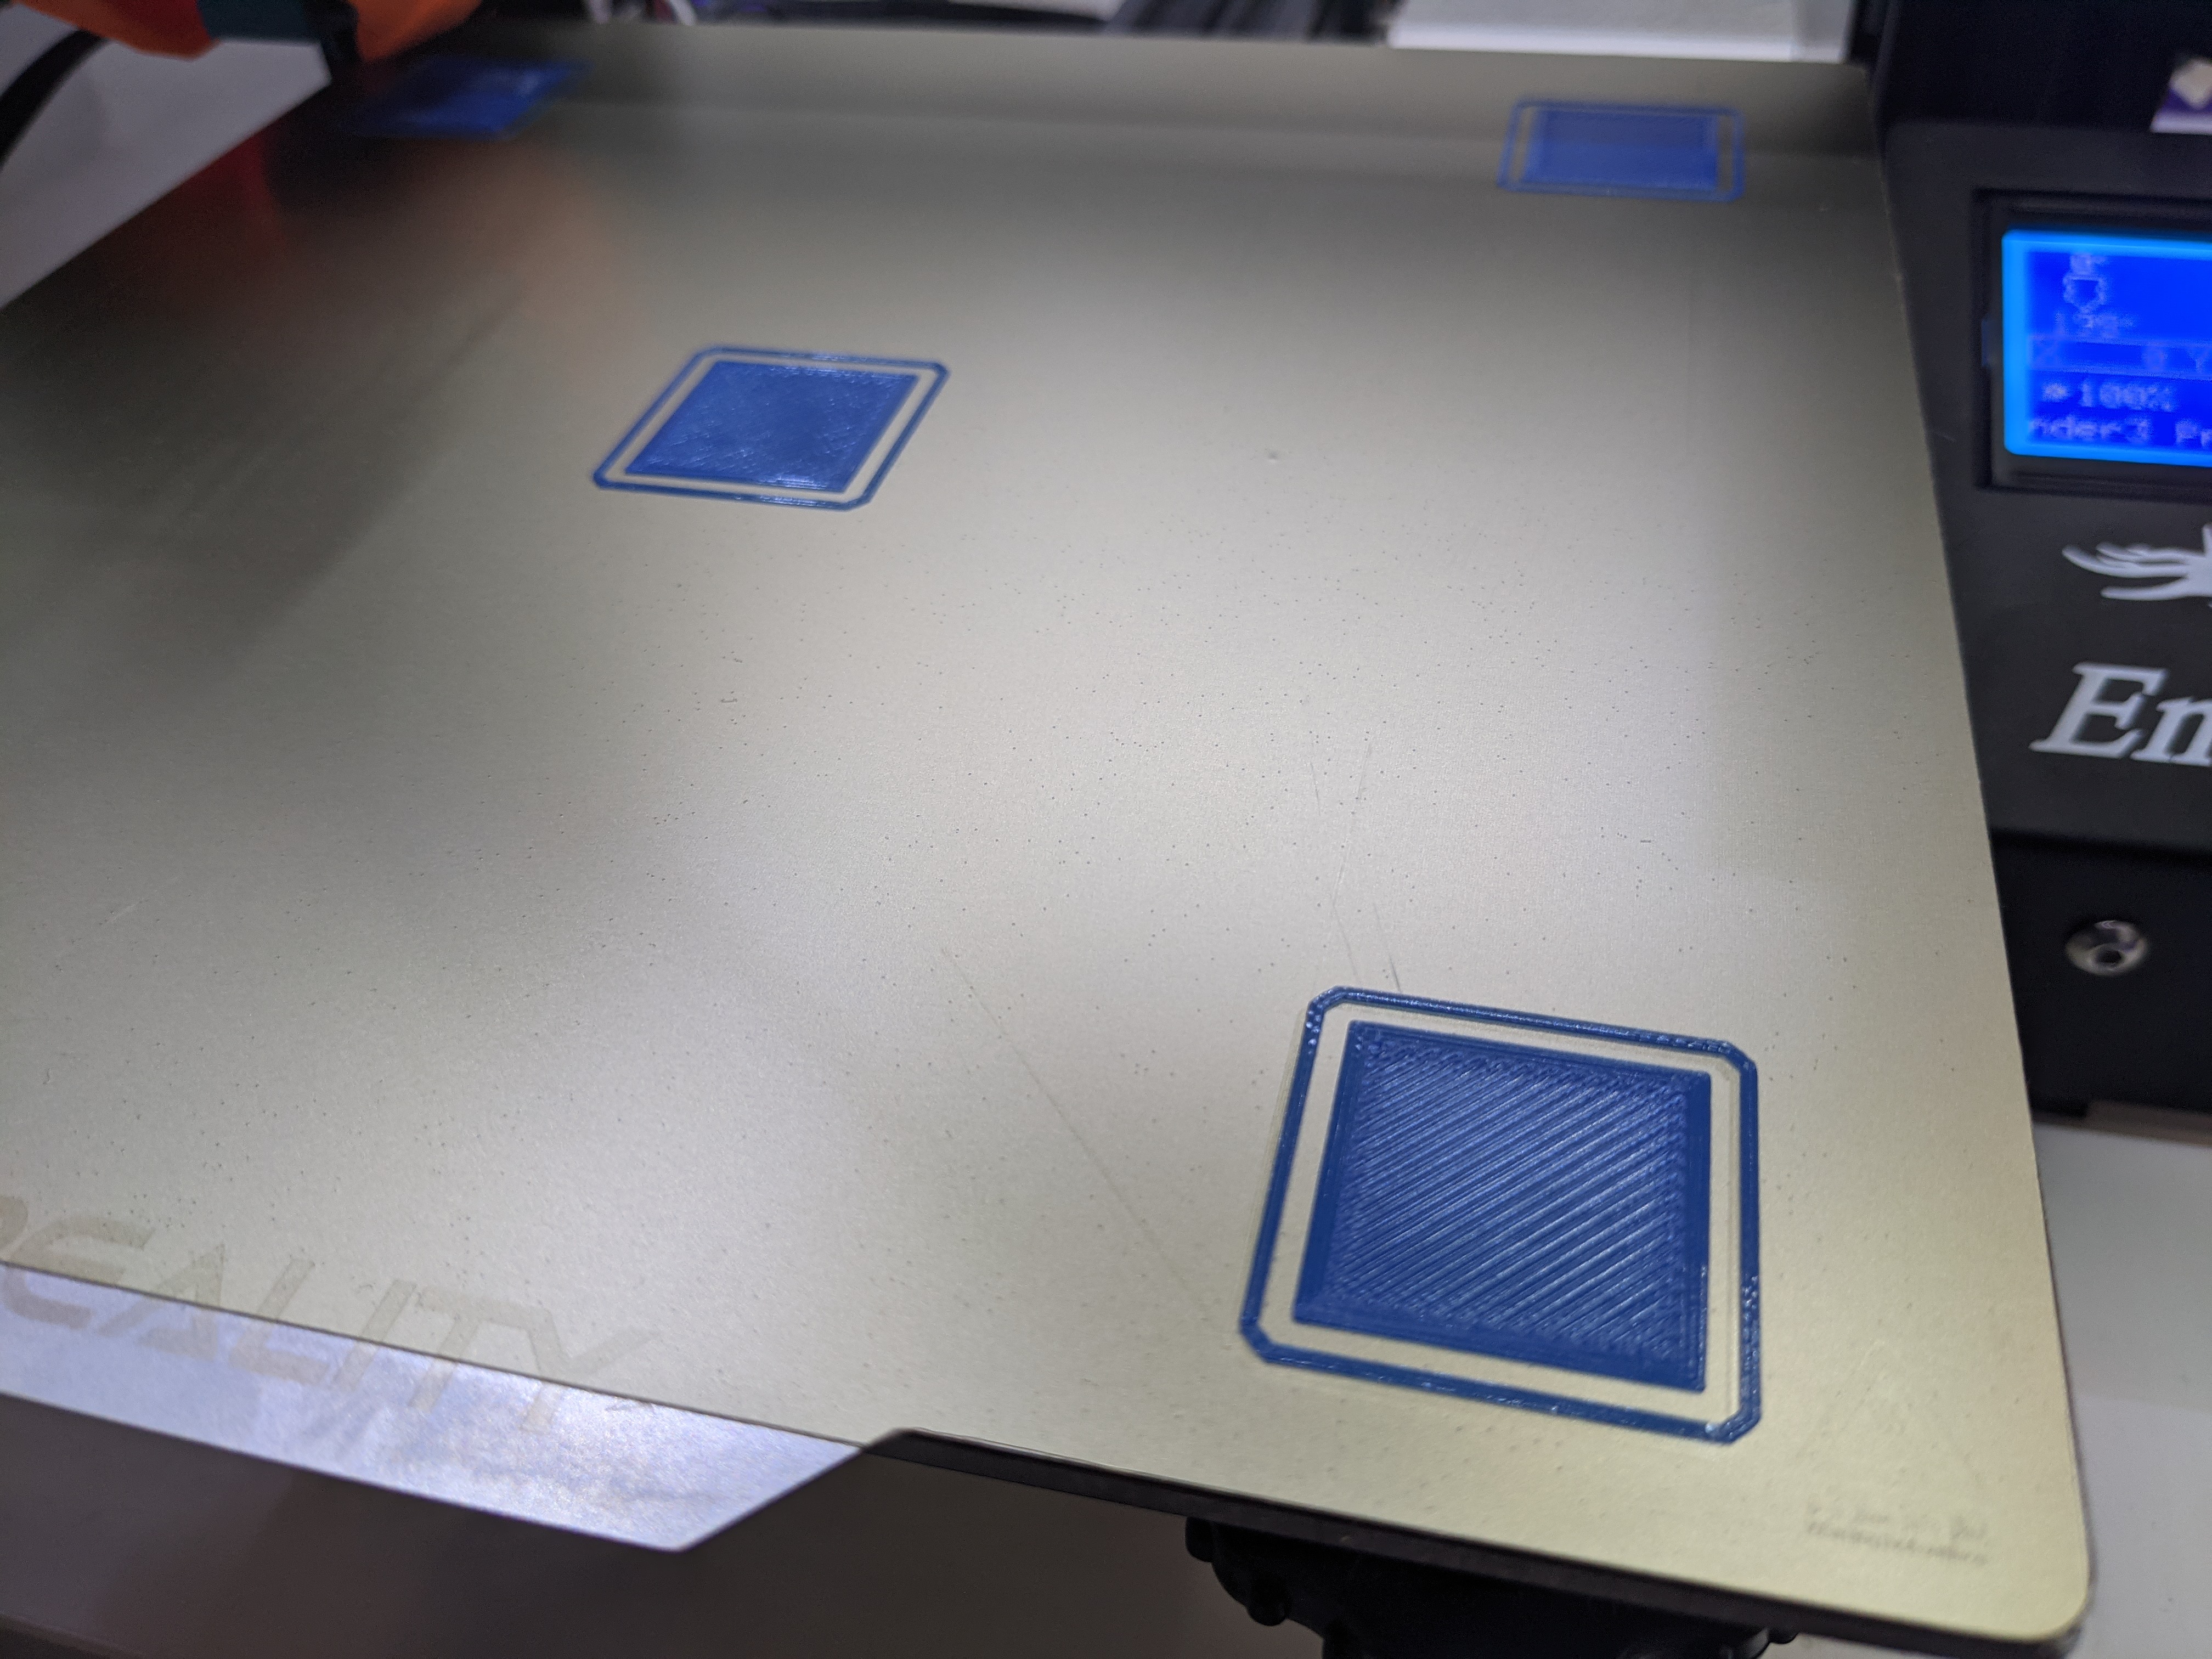
Take a look at this first layer!
Linear Acceleration
After getting a good first layer print, I did print a benchy. While the corners could use a little tuning, I was happy enough with them that I decided to forego linear acceleration tuning for the time being.
I did still have my old value in my firmware config and it seems adequate for now. I’ll save fine tuning it for another day.
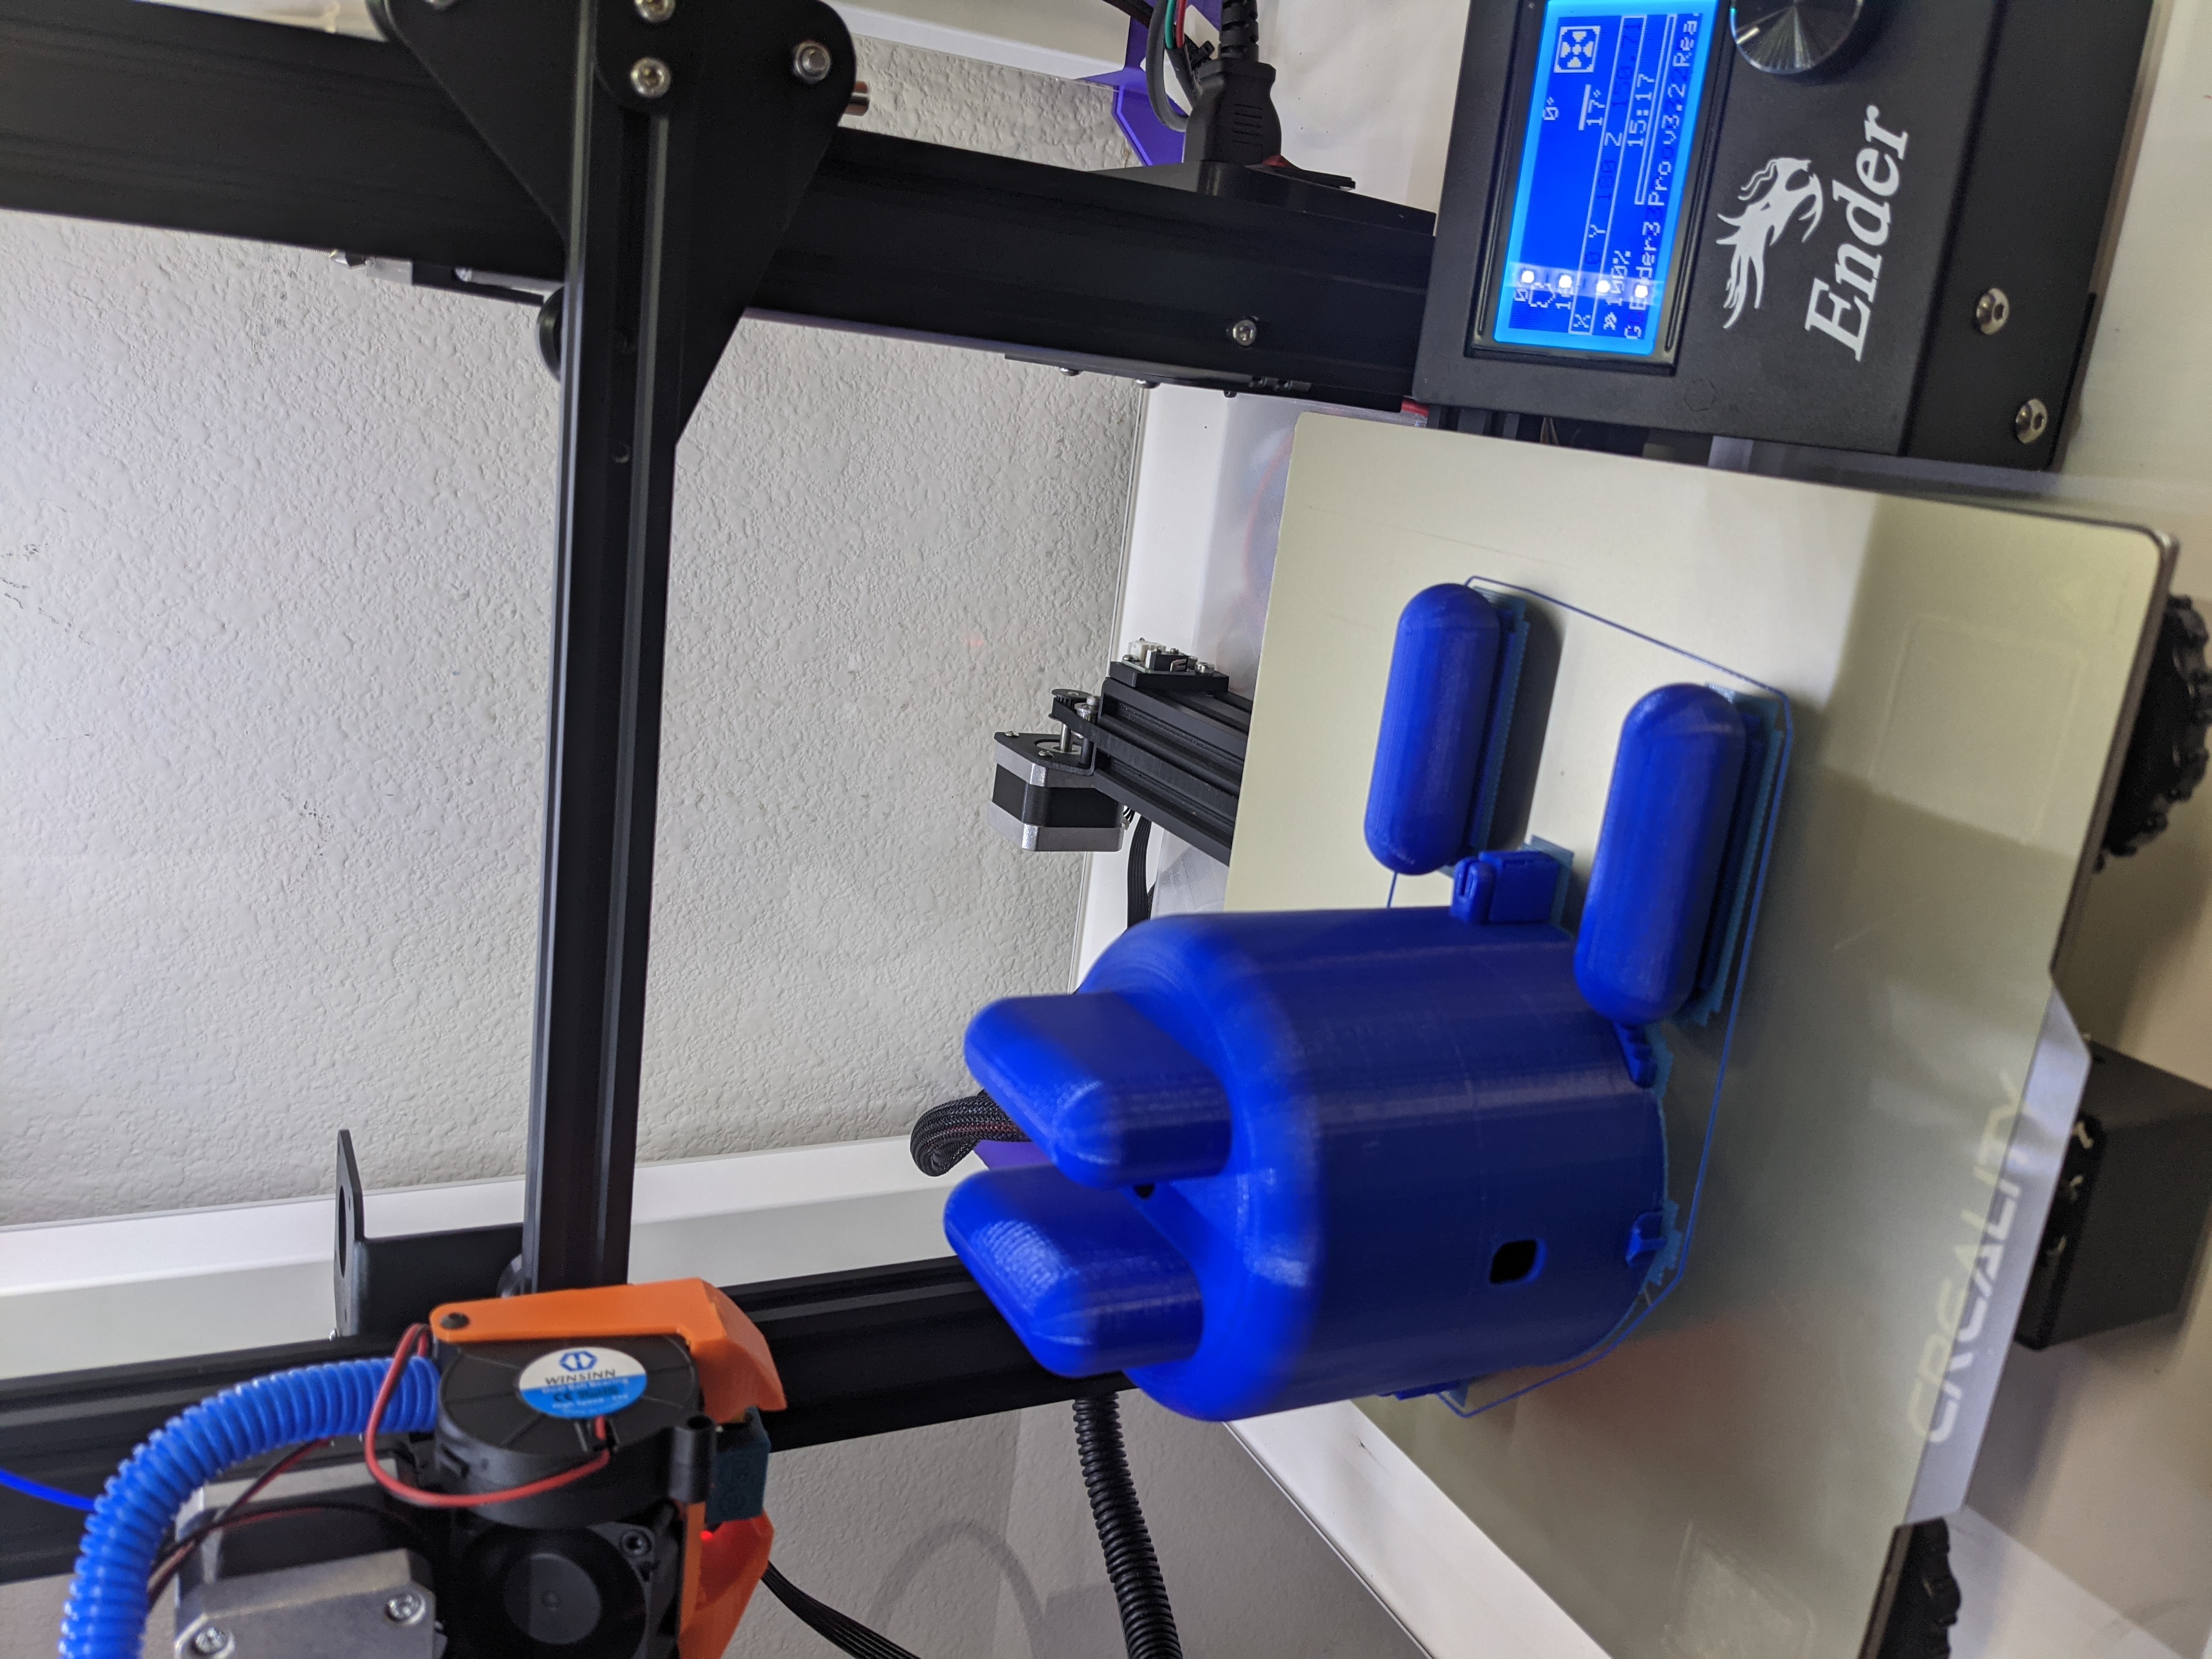
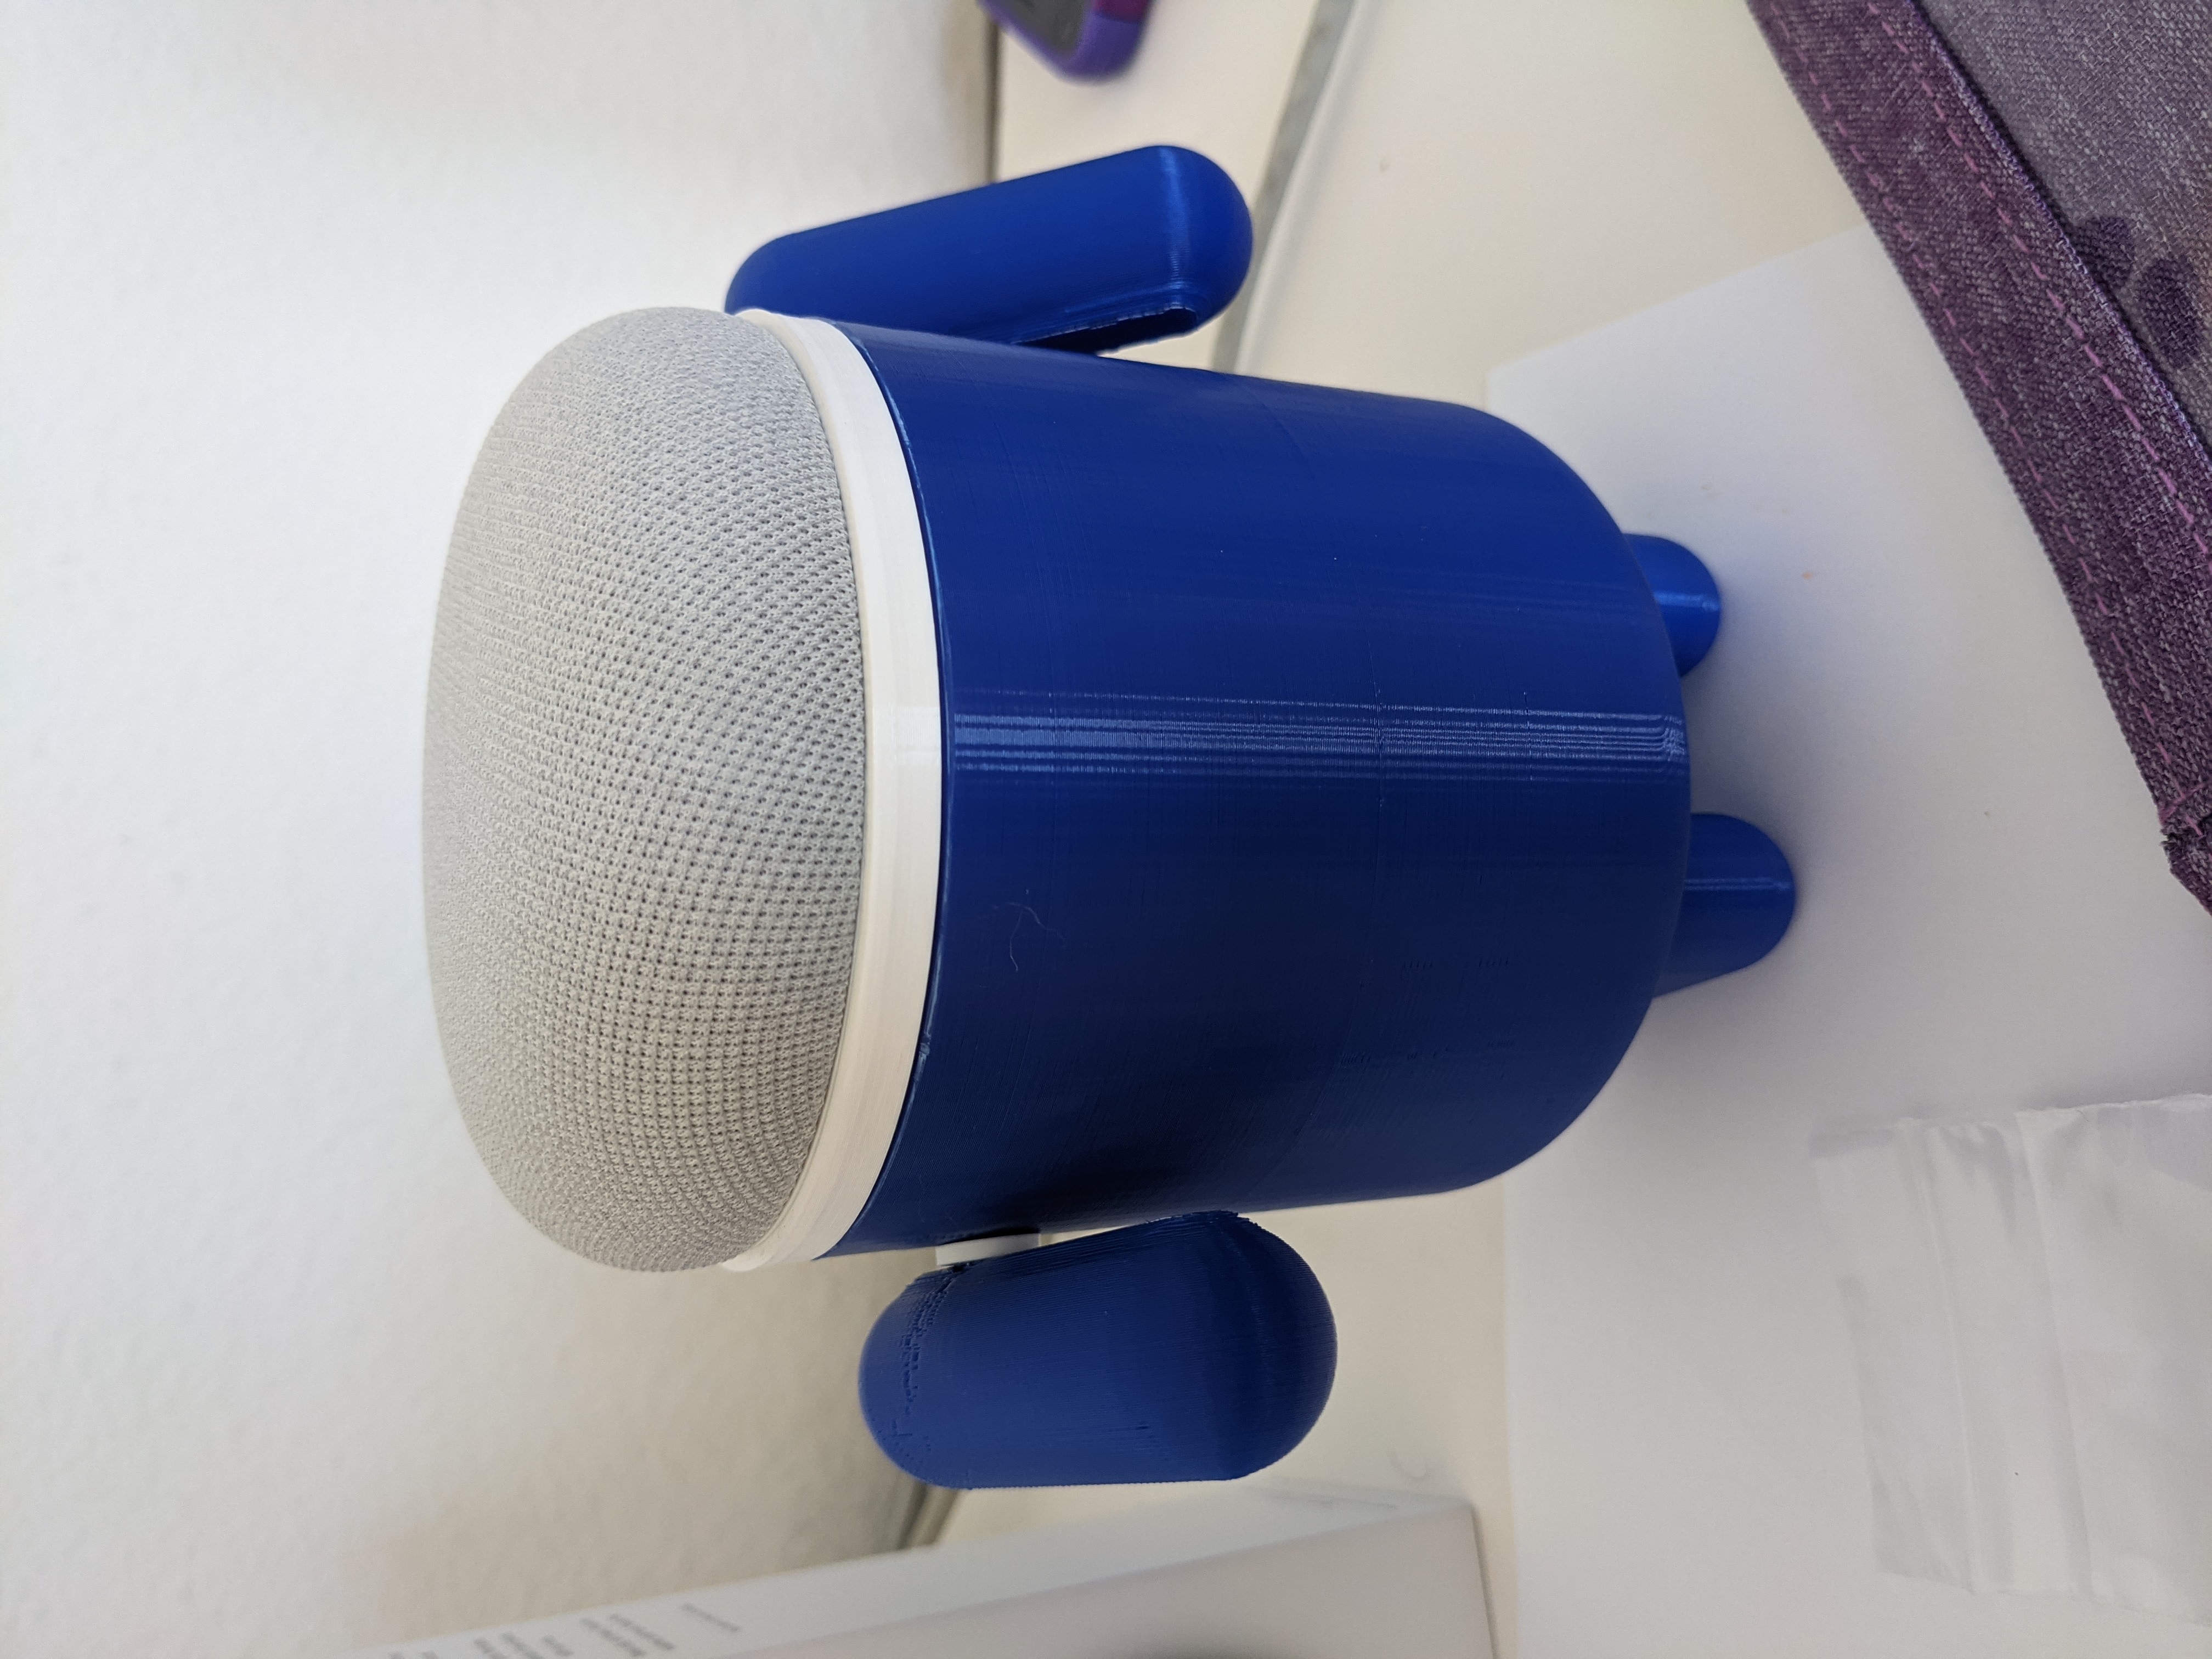
Victory Print
With everything dialed in, it was time to print something useful as a victory lap.
A friend asked me to print this model of a Google Android meant to hold a Google Home or Nest Mini, and it seemed like a perfectly appropriate choice for a victory print.